Walking in VR With ESP32
Hey, hey, hey!
So I’ve recently entered in the VR World.
But as I was playing, I’ve just couldn’t feel the immersive experience using the analogic stick from the controller.
I’ve seen some expensive treadmills that maps your walking directly to the games and I had an idea.
I surely can’t create a safe enough treadmill for me to walk on, but I’m sure I can think of something…
Spoiler alert: I thought of something!
At the end of this post I’ll share all of my ideas and why I’ve decided to stick with this main solution.
All of my code is in my github repo, here: https://github.com/petersen-projects/openvr-walker-with-python
Step One: Writing my OpenVR Driver
So in order to make all of this work, firstly I must add my own OpenVR Driver to SteamVR.
But how can we do that?
I strongly suggest you take a look at this video from FinallyFunctional, as I created my own driver following his steps:
Also, his github repo is here: https://github.com/finallyfunctional/openvr-driver-example
I’ve changed the RunFrame method to the following:
const float STOPPED = 0.0;
const float WALK_SPEED = 0.5;
const float RUN_SPEED = 0.95;

void ControllerDriver::RunFrame()
{
	// Set movement speed.
	float currMovSpeed = WALK_SPEED;
	if (GetKeyState('R') & 0x8000) {
		currMovSpeed = RUN_SPEED;
	}

	// Direction of movement.
	if (GetKeyState('W') & 0x8000) {
		VRDriverInput()->UpdateScalarComponent(joystickYHandle, currMovSpeed, 0);
		VRDriverInput()->UpdateScalarComponent(trackpadYHandle, currMovSpeed, 0);
	}
	else if (GetKeyState('S') & 0x8000) {
		VRDriverInput()->UpdateScalarComponent(joystickYHandle, -currMovSpeed, 0);
		VRDriverInput()->UpdateScalarComponent(trackpadYHandle, -currMovSpeed, 0);
	}
	else if (!(
		(GetKeyState('W') & 0x8000) &&
		(GetKeyState('S') & 0x8000)
		)) {
		VRDriverInput()->UpdateScalarComponent(joystickYHandle, 0.0f, 0); //move forward
		VRDriverInput()->UpdateScalarComponent(trackpadYHandle, 0.0f, 0); //move foward
	}

	// We can also move sideways.
	if (GetKeyState('A') & 0x8000) {
		VRDriverInput()->UpdateScalarComponent(joystickXHandle, -currMovSpeed, 0);
		VRDriverInput()->UpdateScalarComponent(trackpadXHandle, -currMovSpeed, 0);
	}
	else if (GetKeyState('D') & 0x8000) {
		VRDriverInput()->UpdateScalarComponent(joystickXHandle, currMovSpeed, 0);
		VRDriverInput()->UpdateScalarComponent(trackpadXHandle, currMovSpeed, 0);
	}
	else if (!(
		(GetKeyState('A') & 0x8000) &&
		(GetKeyState('D') & 0x8000)
		)) {
		VRDriverInput()->UpdateScalarComponent(joystickXHandle, 0.0f, 0);
		VRDriverInput()->UpdateScalarComponent(trackpadXHandle, 0.0f, 0);
	}

}
The way the above code works is, when we receive an input from the keyboard, we do something with the joystick.
| Key | Action |
| W | Move Forward |
| R | While moving, use Full Speed (RUN) |
| A | Strafe Left |
| D | Strafe Right |
| S | Move backwards |
I’ve kept the support for multiple types of movement, but when I was testing those let me kinda dizzy, so when I’m playing I only move forward.
Now that our driver is created and installed, it should be shown on Steam as follows:
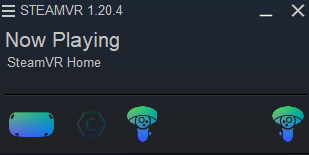
You can also test your new controller by going to SteamVR Settings > Controllers > Test Controller
Choose your newly added controller and press any supported key on your keyboard, it should show that is moving forward / backwards / strafing left or right.
Step Two – Writing a simple Python Socket
After we created and installed our OpenVR Driver, we now have to receive data from our ESP32.
I’ve decided to go to a socket approach, but feel free to do in any way you like.
Our Python server receives data from our ESP32, and if we’re moving, Python will then press the according key in our keyboard.
Simple as that.
The moving code consists of 4 numbers:
| Number | Action |
| 0/1 | Stopped / Moving |
| 0/1 | Walking / Running |
| 0/1/2 | Center / Forward / Backwards |
| 0/1/2 | Center / Strafe Left / Strafe Right |
A lot of these variables are unused since I got dizzy / sick when I’ve tried to use them. So I’ve decided to only run forward.
Using the table above, an example would be:
1110 = Moving, Running, Forward, Center
Step Three – Assembling and programming our ESP32
I’m using an MPU-6050 to detect when I’m walking. I’ve added some checks to see if I’m moving, a threshold on my code serves that purpose with a simple check logic (if gyro and accelerometer surpasses X, the controller should input forward):
void mpu_read() {
  /* Get new sensor events with the readings */
  sensors_event_t a, g, temp;
  mpu.getEvent(&a, &g, &temp);

  accelXCurrValue = abs(a.acceleration.x);
  float accelXDiff = accelXCurrValue - accelXOldValue;
  float accelXDiffAbs = abs(accelXDiff);

  gyroXCurrValue = abs(g.gyro.x);
  float gyroXDiff = gyroXCurrValue - gyroXOldValue;
  float gyroXDiffAbs = abs(gyroXDiff);

  if (gyroXDiffAbs > gyroXMoveThreshold && accelXDiffAbs > accelXMoveThreshold) {
    currentMovement = MOVING;
  } else {
    currentMovement = STOPPED;
  }


  gyroXOldValue = gyroXCurrValue;
  accelXOldValue = accelXCurrValue;
}
The code above uses the gyro and the accelerometer, both in X axis. Both are important to map the way I walk / jog. The thresholds are absolute values, to make the checking process easier.
* If you want to move sideways or backwards, use Y axis and Z axis, respectively – but be careful because it can cause sickness / dizziness.
The plot below shows when I’m walking / jogging, so you can have an idea of how the logic of the thresholds works:

I’ve assembled as follows:
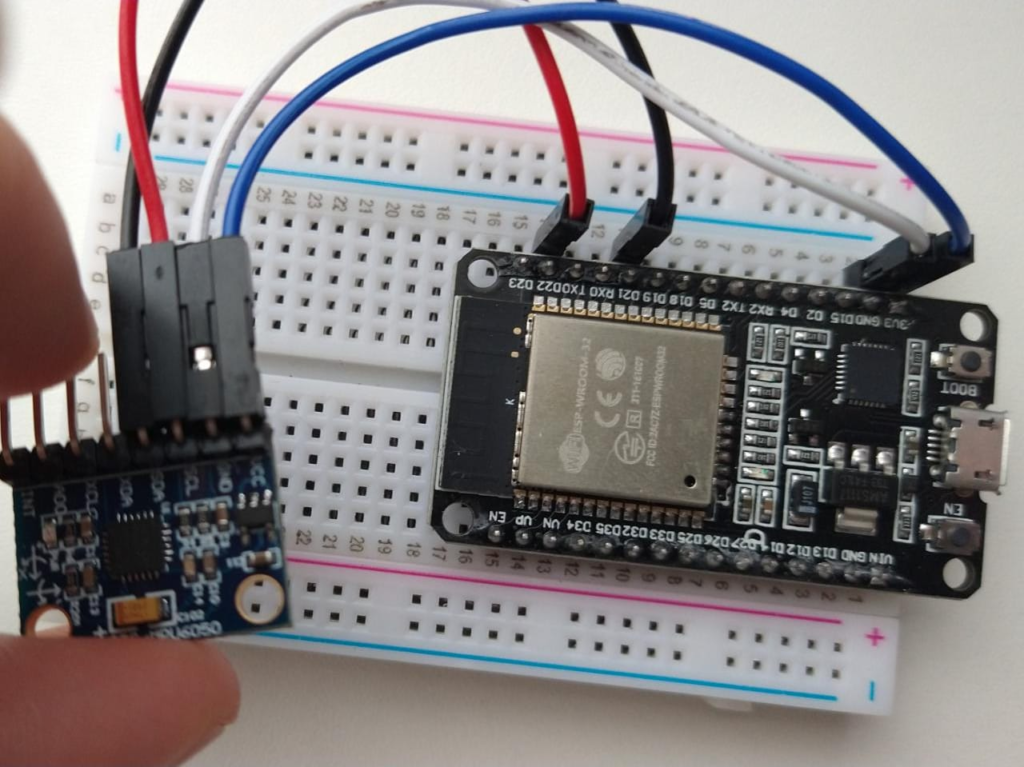
You can find out more at https://learn.adafruit.com/mpu6050-6-dof-accelerometer-and-gyro/arduino
Step four – Does it work??
I’m using the game “GORN” to test my walk detection with ESP32.
So now that we have all ready, let’s test it!
I’ve thought of putting this device in my ankles, with two MPU-6050. But I’ve discarded the idea for simplicity. Perhaps in the future I’ll go back to this, but for now, having it in my chest works just fine.
It works well, some false positives but I think thats just a calibration issue. I’m sure that I’ll have a lot of fun using this new controller that I’ve made!
What were the other options that I’ve tried
I mainly tried DLL Injection in a process, but discarded the idea because I think I’ll always have to program new code to different games. I wanted a global solution that would work out of the box with any VR game that uses OpenVR.
I also went to try some reverse engineering in unity dll’s, tried to debug processes and so on. But I gave up after three days getting nowhere.
Whats in for the future and final thoughts
I’m thinking of moving the MPU-6050 to my ankles and add a new one, to track both legs. As for now, I really don’t know if I’m able to connect more than one module to the ESP32 as I didn’t find anything mentioning it.
As it stands it’s a pretty good solution, more immersive and helped a lot with dizziness / move sickness when using the analogic from the controller to move. I really liked this new controller that I’ve made.
Thats it, I hope you’ve liked this post and I hope to have helped you!